Installing the Raspberry Pi AI Module
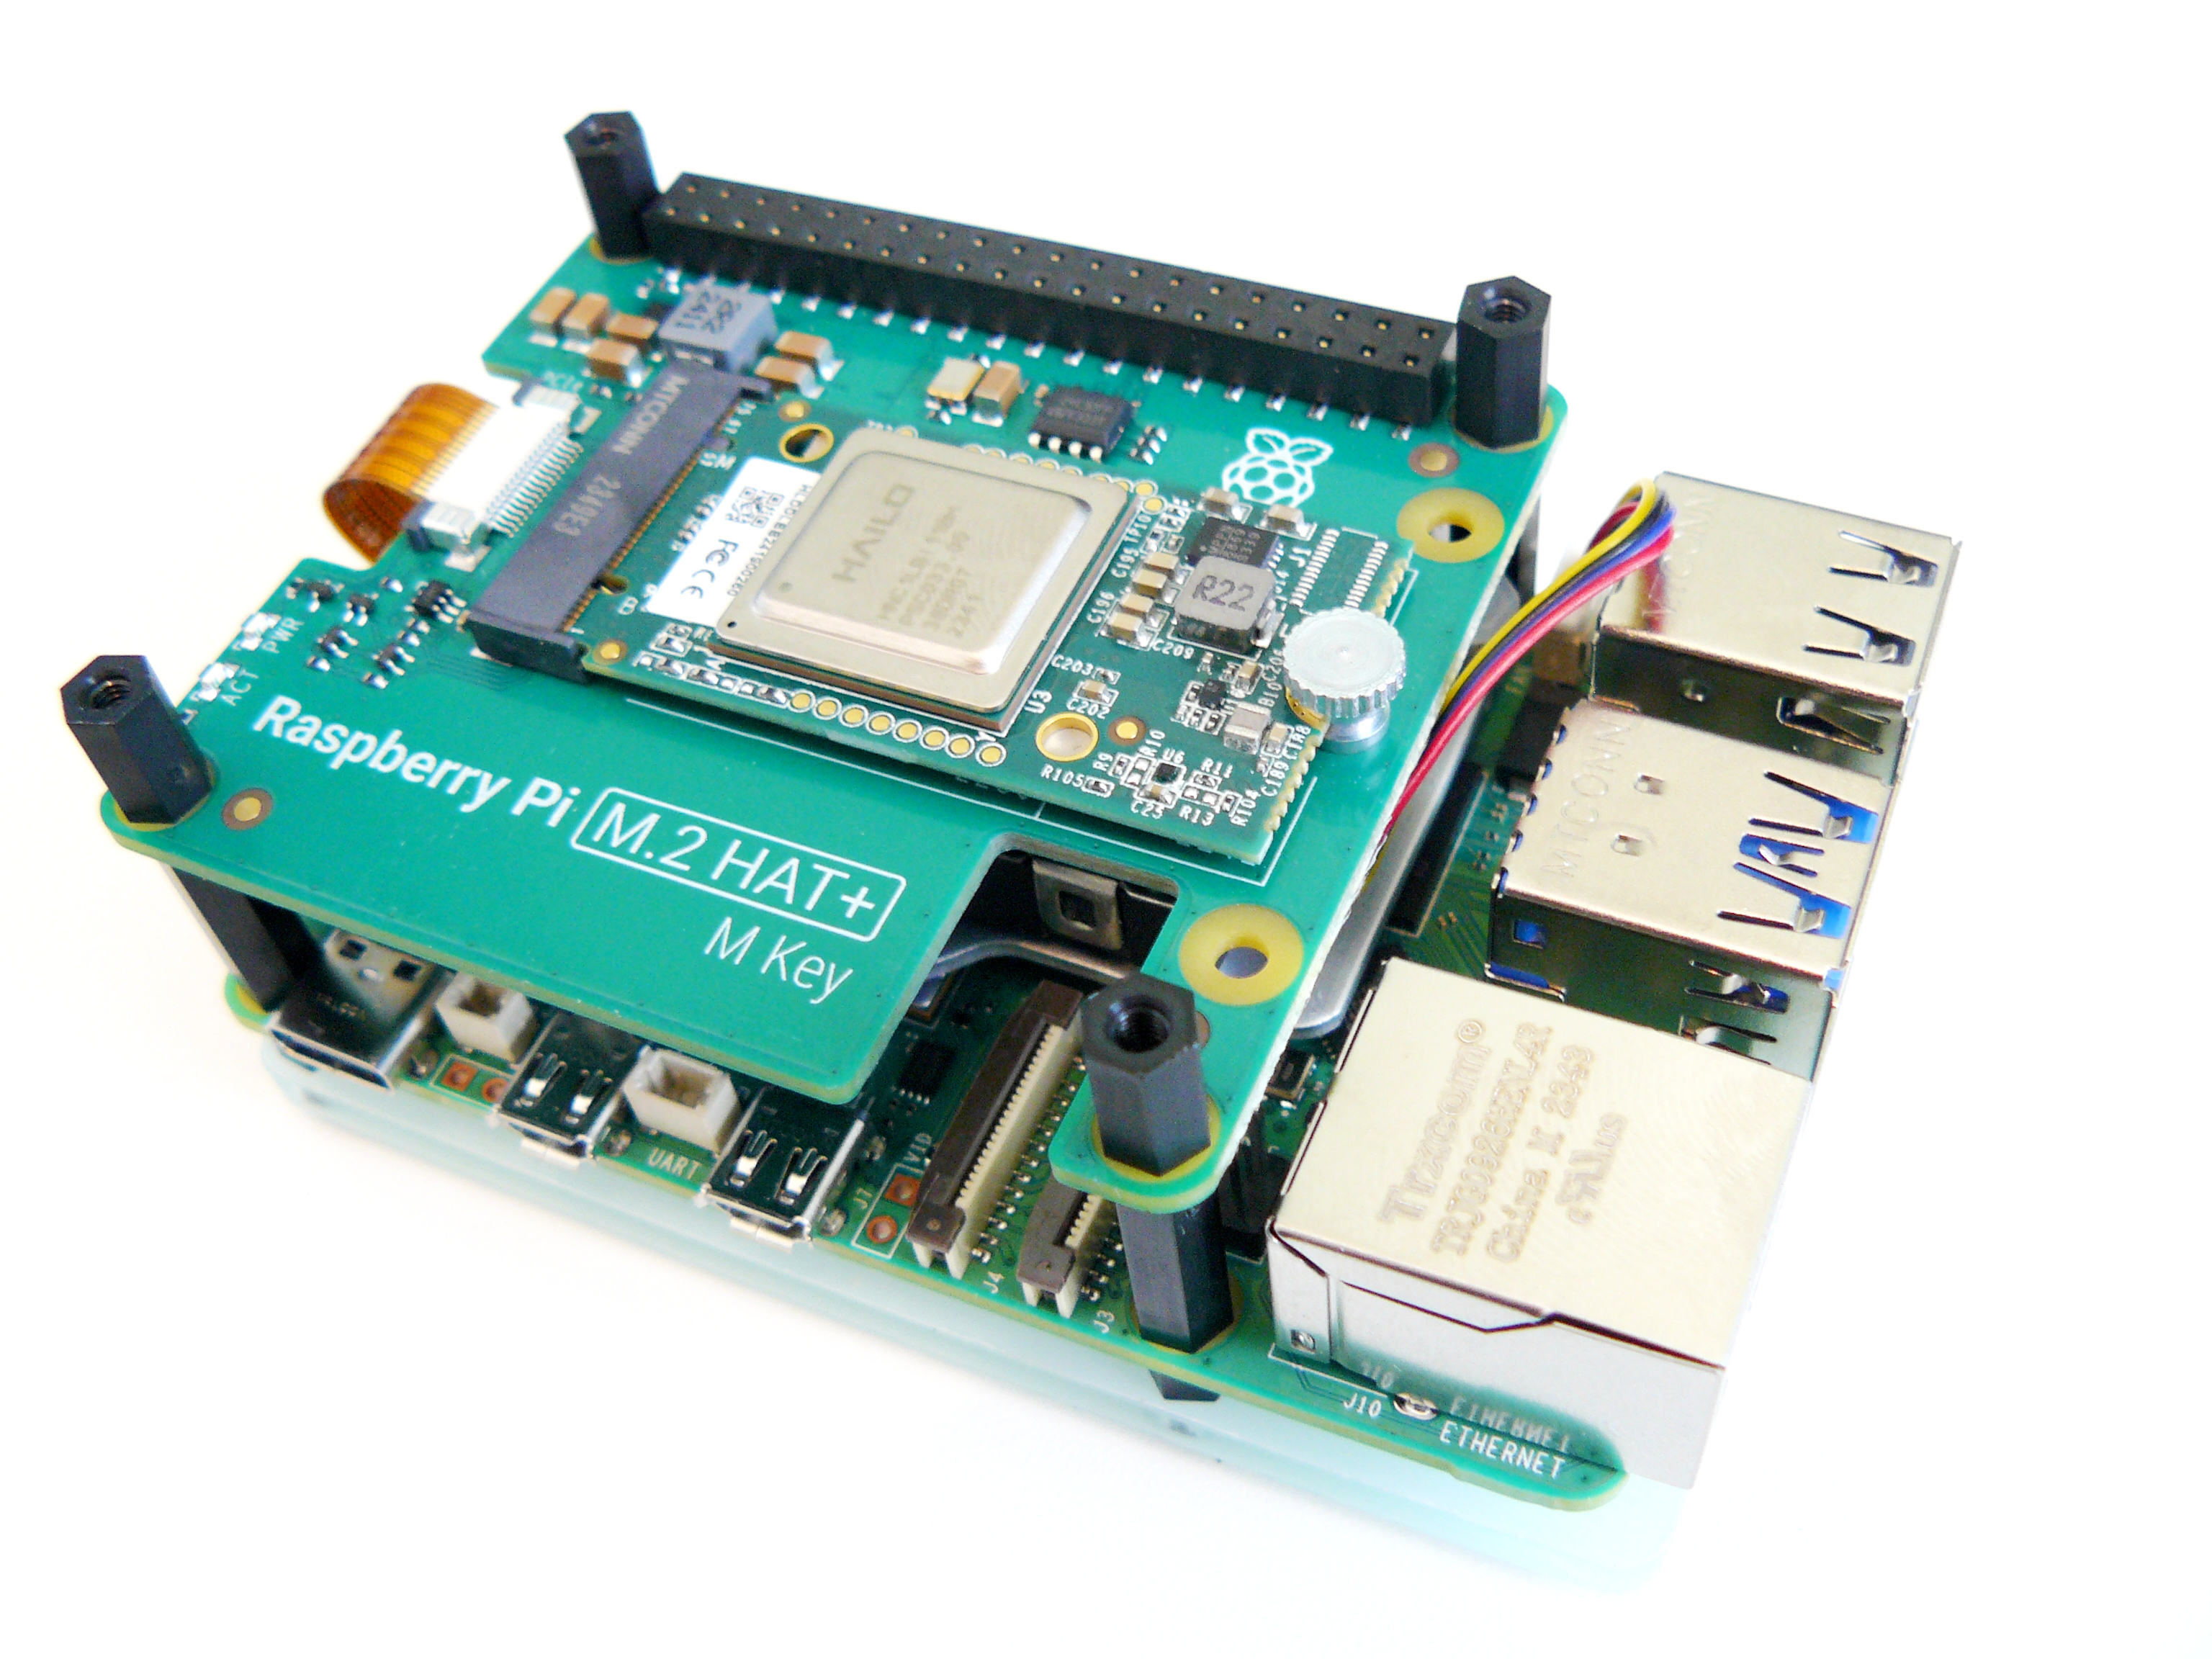
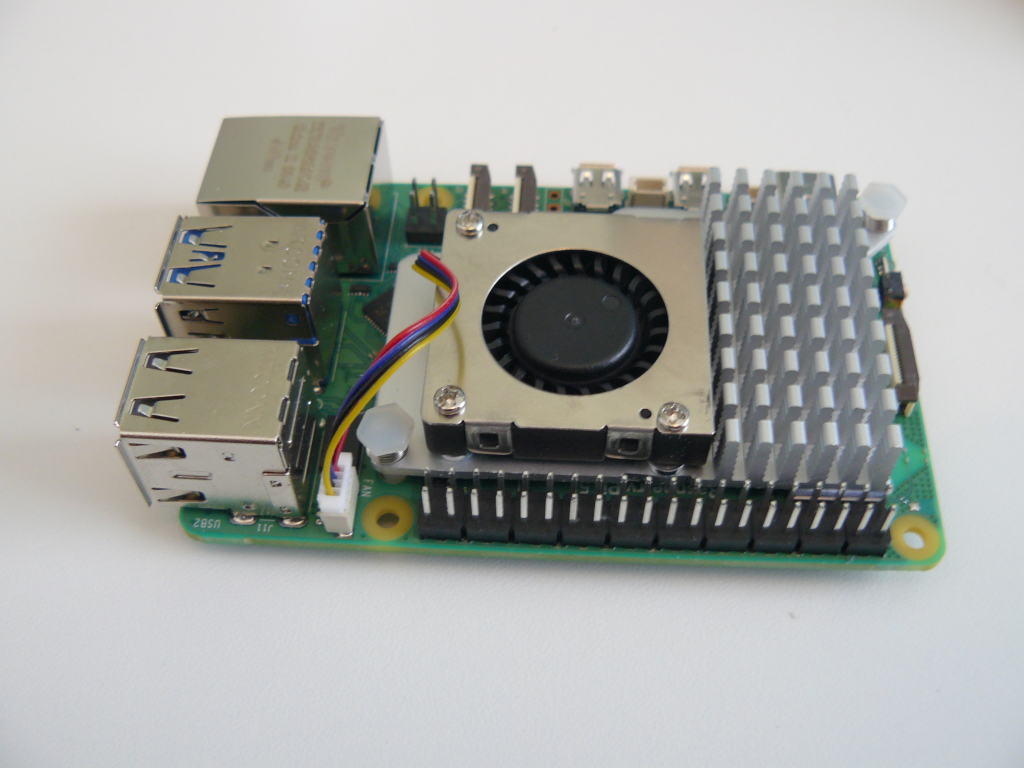
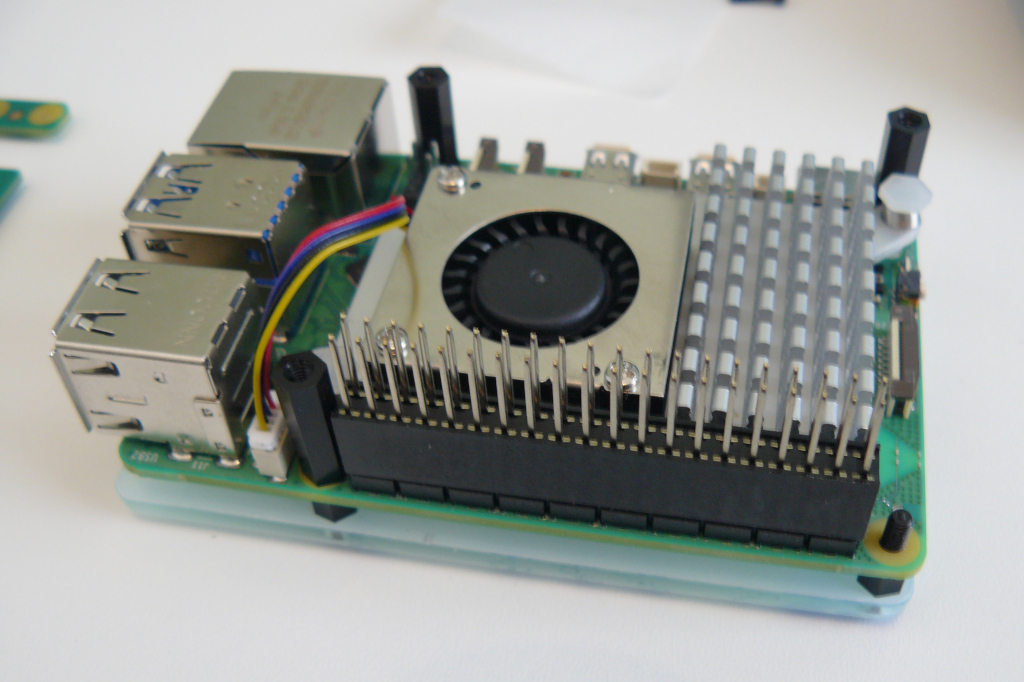
The Raspberry Pi AI accelerator module requires PCIe which is available on the Raspberry Pi 5. It will not work with earlier Pis. The official AI module is supplied with all parts necessary for installation including the M.2 hat, a GPIO extender, cable, screws and plastic posts. However, while not essential, it is recommended to first install the Raspberry Pi active cooler module which is not included in the kit and is a separate purchase.
The Raspberry PI AI accelerator module is supplied as an M.2 hat with the module pre-installed. The M.2 standard is most commonly used for SSD storage but actually exposes full access to PCIe. Other types of PCIe expansion cards can also be used in an M.2 slot where available in the format.
Next install the supplied GPIO header extender which allows the pins of the GPIO socket to reach the M.2 hat. Also install the four supplied plastic posts by screwing them into the four screw holes at the edges of the Raspberry Pi.
There is a flat-flex cable taped to the bottom of the M.2 hat that is used to connect it to the Pi. Remove the tape.
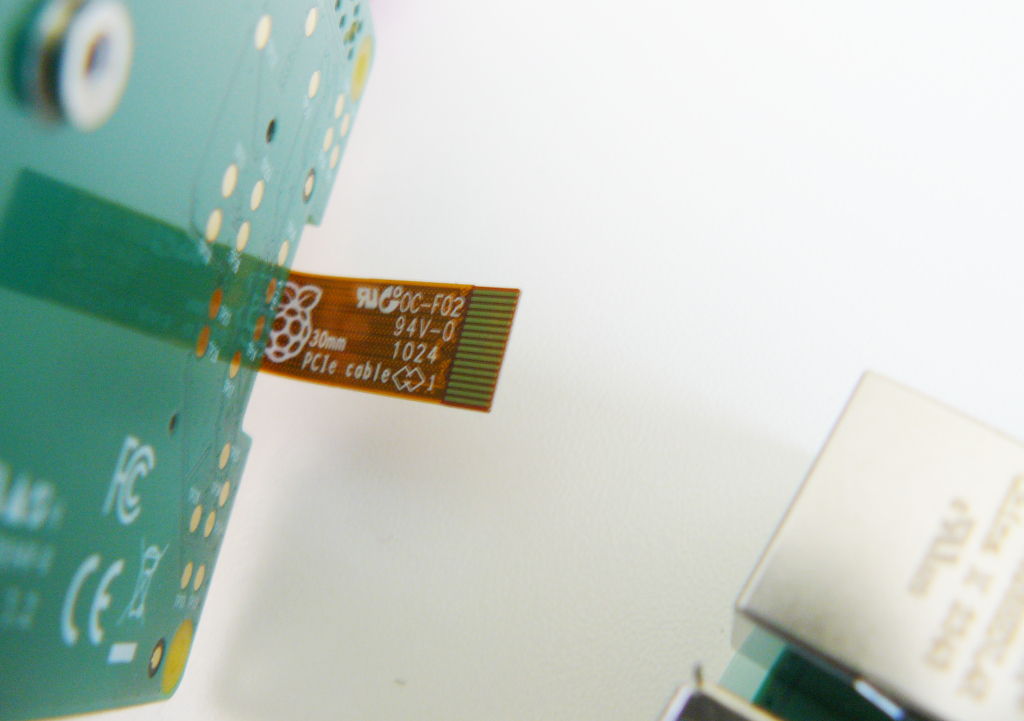
This slots into the Raspberry Pi 5 PCIe connector which is on the edge of the board next to the reset switch.
Pull up the brown plastic of the connector as far as it will go. It should lift a couple of mm. Insert the flat-flex cable from the M.2 hat. The gold connectors on the cable should be facing inwards (in the direction of the USB-A sockets and heatsink).
Then push down the brown socket surround firmly to secure the cable.
Now line up the screw holes of the M.2 hat with the four plastic posts and be very careful to ensure the pins of the GPIO extender are aligned with the header on the M.2 hat. Gently press down the M.2 hat onto the GPIO extender, being very careful not to bend any pins.
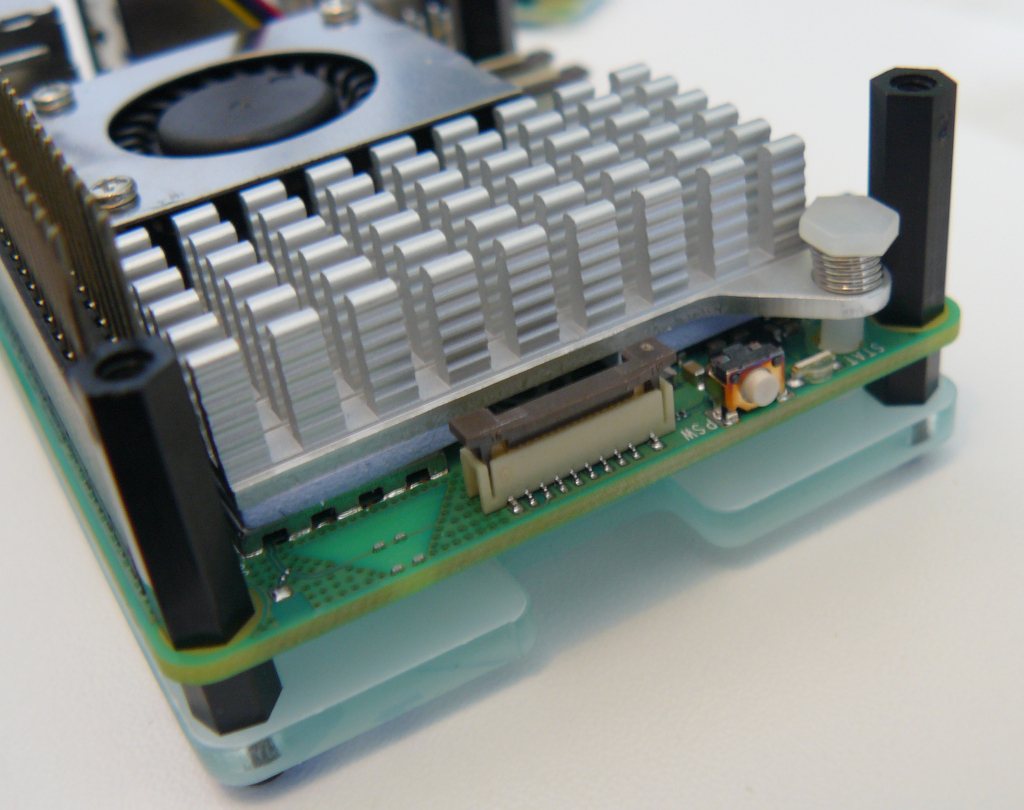
Screw the M.2 hat into the four plastic posts to secure it. Here the module is shown held in with four additional plastic posts for an extra level. These are not supplied, the AI module kit comes with screws.
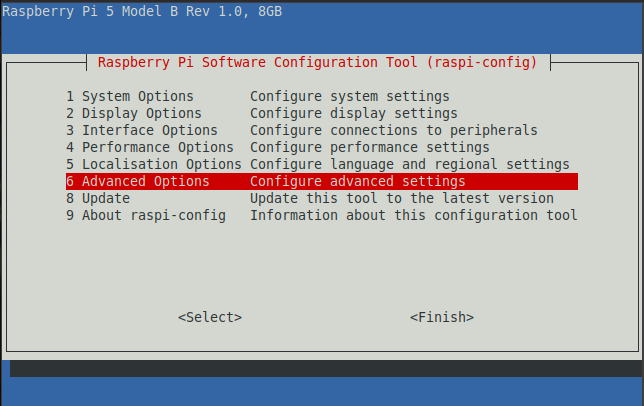
Now enable PCIe 3 in raspi-config. Firstly do:
sudo raspi-config
Then choose Advanced Options:
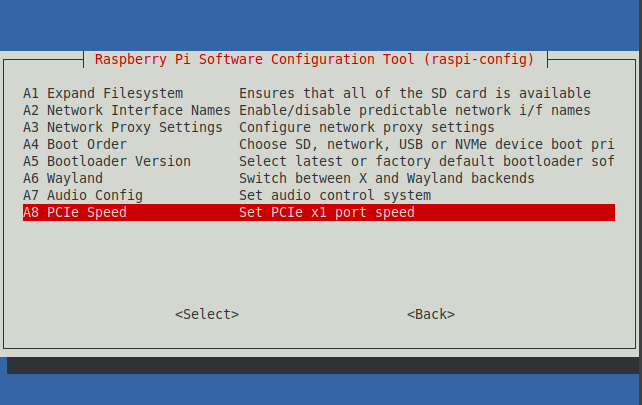
Now choose PCIe Speed:
And say yes to enable:

Exit raspi-config
Now do:
sudo apt install hailo-all
And finally, test your AI accelerator is working correctly by doing:
hailortcli fw-control identify
And you should see output like this:
Executing on device: 0000:01:00.0
Identifying board
Control Protocol Version: 2
Firmware Version: 4.17.0 (release,app,extended context switch buffer)
Logger Version: 0
Board Name: Hailo-8
Device Architecture: HAILO8L
Serial Number: HLDDLBB241900260
Part Number: HM21LB1C2LAE
Product Name: HAILO-8L AI ACC M.2 B+M KEY MODULE EXT TMP
You might like to clone this git repo, which contains a number of examples:
git clone --depth 1 https://github.com/raspberrypi/rpicam-apps.git ~/rpicam-apps