Installing the Active Cooler on a Raspberry Pi 5
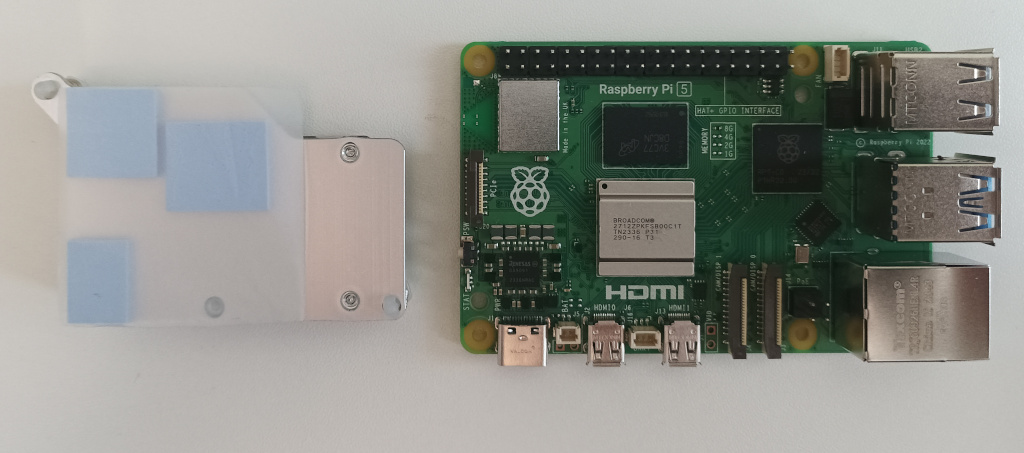
To install the official active cooler module (heatsink and fan) onto a Raspberry Pi 5, first look at the underside of the module and remove the plastic film covering the blue thermal pads.
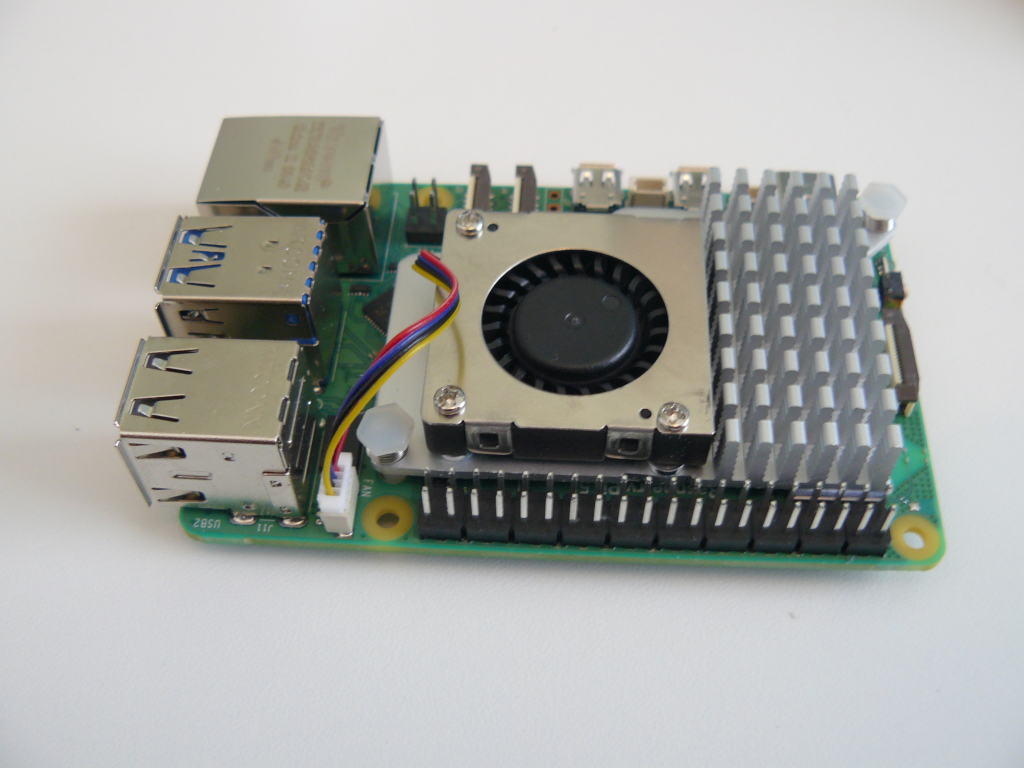
Next flip the cooler over. Place the cooler roughly into position. It sits just below the GPIO pin header with the fan nearest the USB sockets. Do not press it into position yet as you'll need to wiggle it a little to get it lined up perfectly and you don't want it to stick to the board. Lay it down gently.
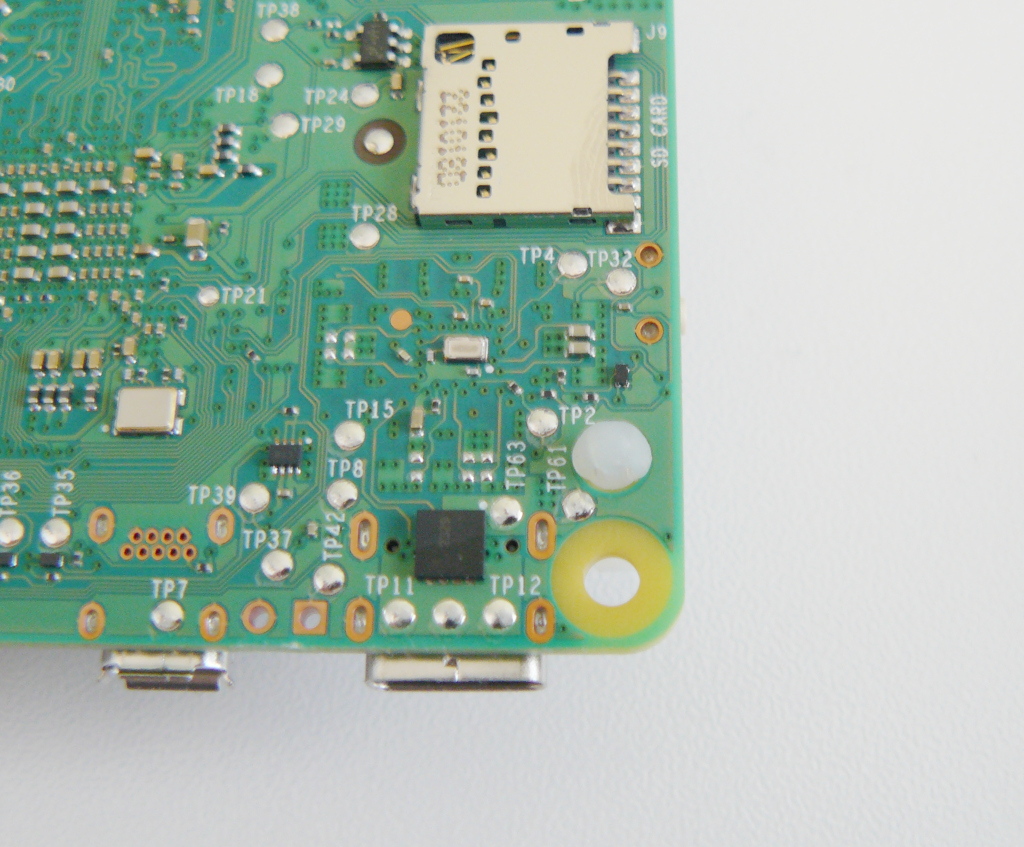
There are two spring loaded plastic lugs either side of the cooler, diagonally opposite each other. These line up with two holes in the board. One of the holes is near the USB-C power connector and the other is between the USB-A sockets and the GPIO header. Wiggle the cooler until these lugs line up perfectly with the holes.
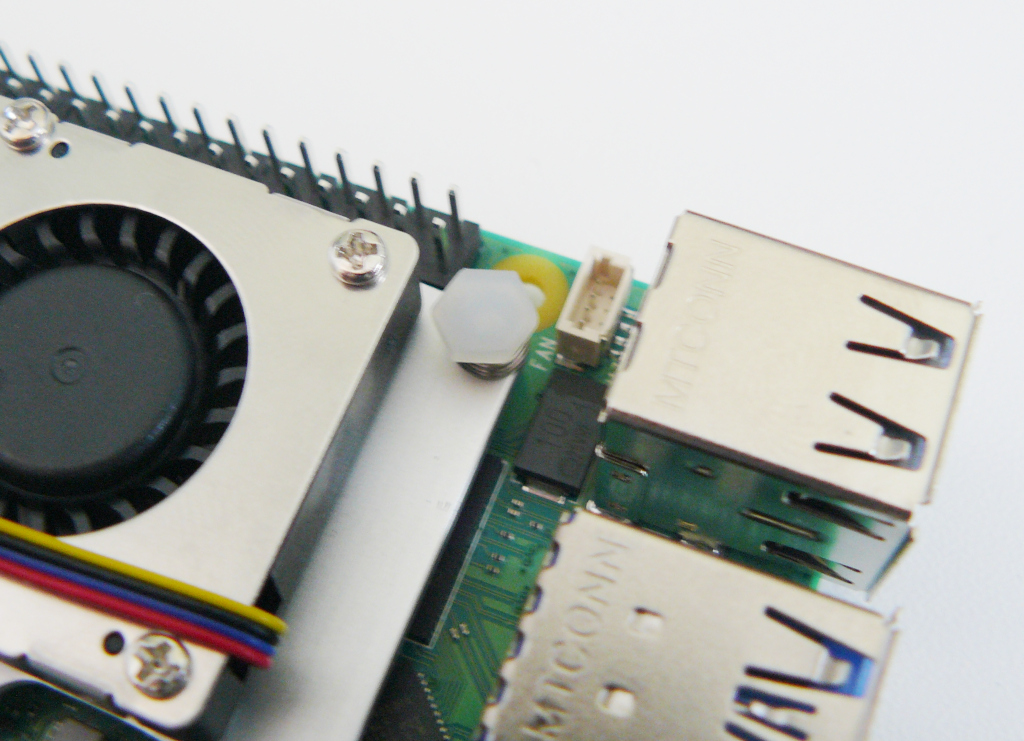
Press the top of each lug to push it through the respective hole until it locks into place. The end of the lug springs outward to hold it to the underside of the board. The cooler should now be firmly attached to the board.
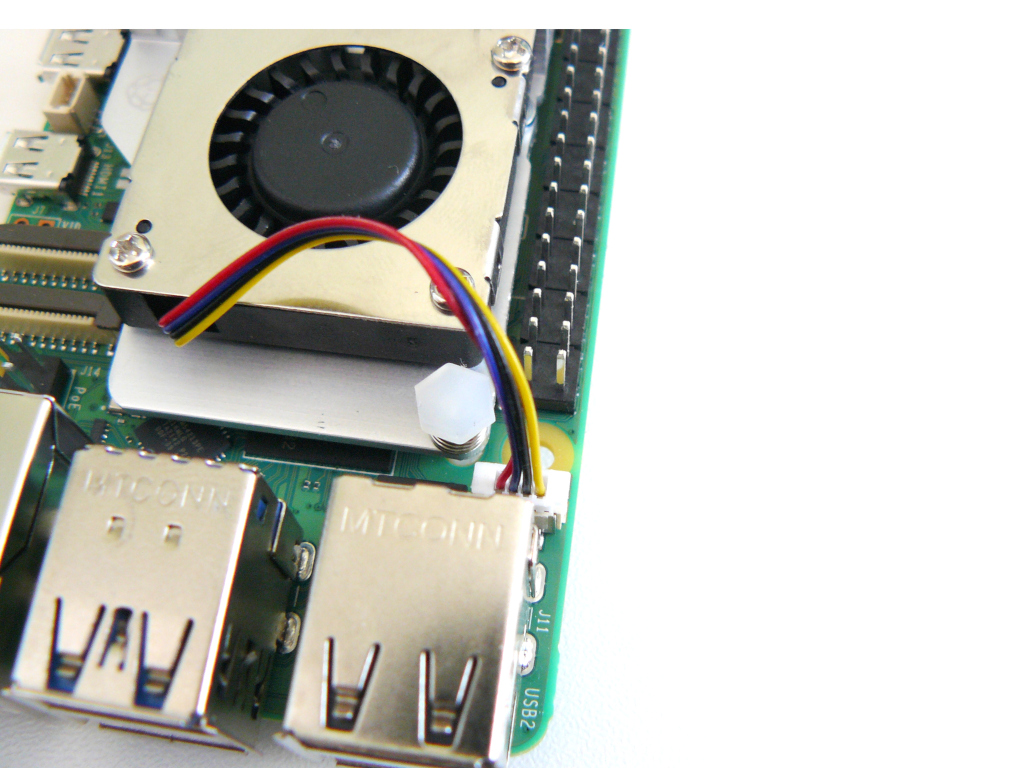
Now plug in the fan power cable. This is located between the USB-A sockets and the GPIO pin header near one of the lugs. When the plug is the right way round, the yellow wire should be nearest the outer edge of the board and the red wire is on the inside.
The cooler is now installed and ready to use.